


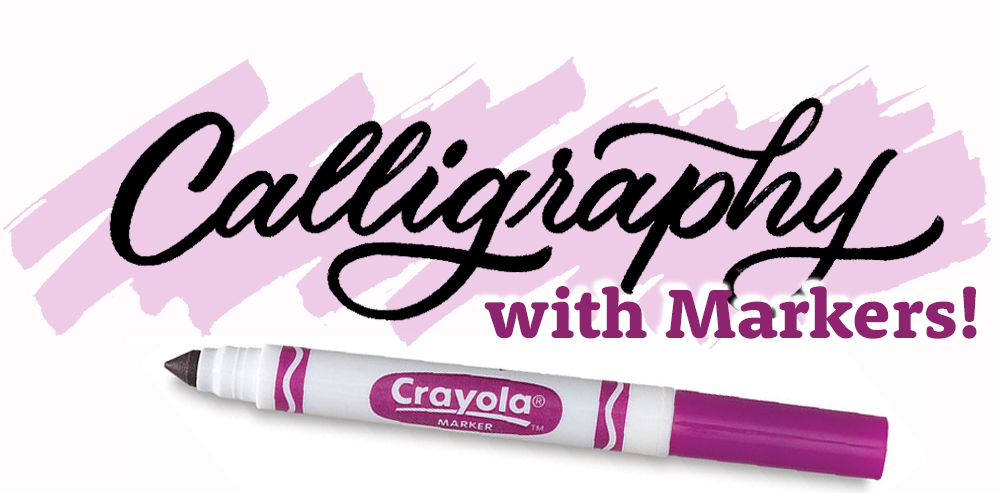
Crayoligraphy: Calligraphy + Crayola Markers
Make Super Awesome Lettering with Free Crayoligraphy Digital Downloads!
Letter with what you’ve got ✍️
I’ve seen it so many times before — a student wants to try a special art, and they are nervous to begin before purchasing the exact-right tools. It’s a serious roadblock, and keeps beginner learners from ever just starting. It’s as if somehow this one magical art material (a brush, pen, paper, whatever!) is the single most important step to creating worthwhile art.
While that may be true with highly specialized processes (you obviously cannot start linocut printing without linoleum and cutters), it is absolutely NOT required to begin Hand Lettering!
I subscribe to the belief that tools do not make the artist. This is especially true with the art of Hand Lettering — the process is essentially drawing letter forms with lines and curves, which can be as basic or ornate as the artist so chooses. One only needs a basic writing instrument and paper to begin.
Calligraphy, a more specific form of Lettering, is an art form based on elegantly executed written letters. Traditionally, Calligraphers use ink and a nib to achieve delicate forms and swashes with a (mostly) continuous stroke. It requires the artist have full control over their writing instrument, and the best Calligraphers have trained their hand to write those gorgeous words, seemingly with great ease.
However, what if I told you that you can begin a version of Calligraphy using some basic markers that you probably have lying around the house? It’s totally possible!
Enter Crayoligraphy — proof that cheap markers can make beautiful Lettering art 🌈
When I see these Crayola Broad Line Markers, I’m immediately taken back to my childhood. The thick barrels with bright colors take me right back, and I’m reminded of how many dried out because someone didn’t click the cap back on correctly.
I also remember them being quite bulky — in fact, as I grew and started coloring and drawing more detailed work, I upgraded my markers to a sleeker version, leaving these Crayola markers to collect dust.
Perhaps you have small children, and these markers are found in various corners of your home? I remember those days! I have older school-aged children myself, who are far too mature (lol), but we still have a large tub filled with these colorful babies.
Either way, I know you know these markers well. You may be asking yourself, how in the world do these chubby kids’ markers make beautiful Calligraphy?
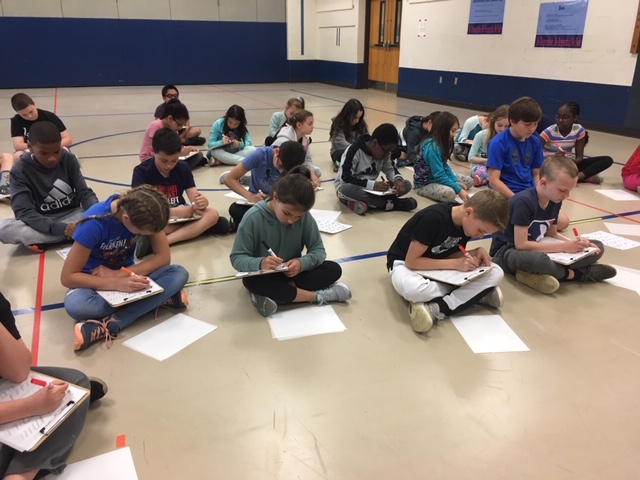
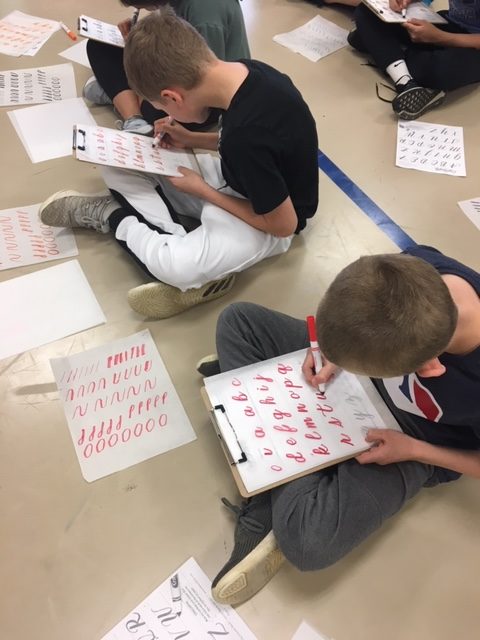
Fourth graders hard at work using Crayola Markers during my Hand Lettering workshop 😁
The Power of the Marker Nib
Well, my Friend, the power is in the nib of the marker (that’s the tip part of a writing instrument that comes into contact with the paper). The Crayola Broad Lines are specifically designed to have a very slight flex to the nib area, which can bend depending on the pressure you add during your writing. While they may not flex as nicely as the Tombow Fudenosuke Brush Pens, the Broad Line markers can create thin upstrokes and thicker swell downstrokes, which is the basis of traditional Calligraphy letterforms (more explanation on that later).
Therefore, those cheap-os (and I say that with total respect for affordable materials) are actually a perfect tool for beginner Calligraphy. Anyone can use them — your kiddos, your students (if you’re a classroom teacher), or even adults who are looking to get in on the play time! And bonus, they have little mess, as compared to dipping a nib into ink like the professionals do.
How to Write Calligraphy with Markers 🤩
Supplies & Guide Sheets (Free Download!)
First up, grab those Crayola Broad Line Markers (any color!) and some smooth paper that won’t damage the felt tip. I use HP Premium 32 Laser Jet Paper for all my Lettering and Illustration practice needs — it’s affordable and velvety smooth. If you’re a true beginner, you may want to gather some tracing paper (I enjoy using Bachmore Vellum Tracing Paper) to practice your letter strokes, which is explained further below.
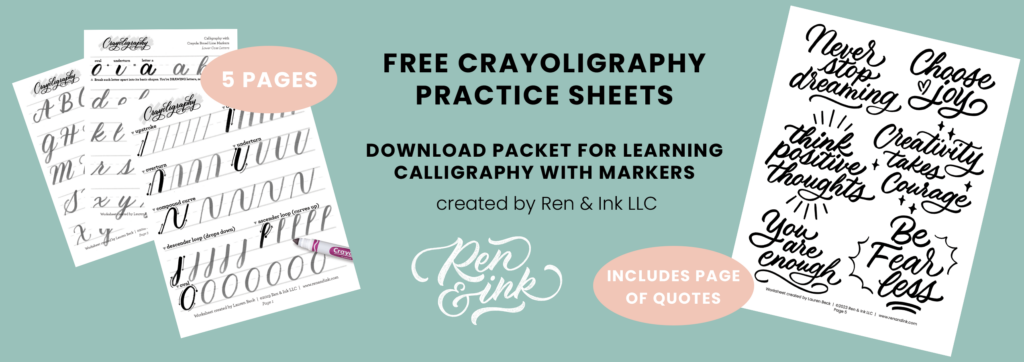
Super bonus — you can download my Crayoligraphy practice worksheets for FREE! It includes four pages of basic strokes, a lowercase and uppercase alphabet, and even a page of cute inspirational quotes for your personal use. You can print these sheets and get ready to use your supplies to make gorgeous Calligraphy!
Your Writing Position — it makes a difference
Perhaps holding a marker doesn’t seem like a big deal — but with Calligraphy, it’s important to use the tool properly so your thick and thin strokes transition to make beautiful letters!
Hold the marker with your normal writing / drawing grip, but make sure you’re not squeezing the marker too hard (no white knuckles here!). The marker barrel should fall to the side at an angle, not straight up and down. This position is important so you can take make use of the slight flexibility of the nib, getting those desired thicks and thins. Your pen may shift here and there, and that’s okay — but generally you’ll be keeping this consistent position throughout all of your lettering, just changing the pressure in which you’re pressing the tool as you write.
Another positioning to be aware of is the way your paper sits on the table. I prefer to slant my paper slightly, so I’m writing away from my body. By doing so, my Calligraphy ends up with a slight tilt to it, which I prefer the look of. Try it out!
Lastly, be aware of how you’re sitting in your chair — good posture is helpful for all Lettering! If you begin to slouch or sit crooked to your workspace, it will reflect in wonky letterforms.
What’s really cool is that all of these positioning tips are the same as Brush Calligraphy, so if you get the hang of using Crayola markers, then moving up to some brush pens will be easy peasy!
Thin Stroke Up, Thick Stroke Down
The beauty of Calligraphy is admired because of its variations in line width, adding to the movement and elegance of the lines. The look is easy to achieve with a simple rule — and honestly when I was learning Calligraphy, this one rule made everything click for me!
When writing a letterform, upstrokes (any line moving up the page) are thin hairlines with light pressure on the pen, and downstrokes (any line moving down the page) are thick swells using more pressure on the pen. Around curves there are transitions, but this rule generally holds true with all Script Lettering and Calligraphy.
Using the Downloadable Practice Sheets
Now that you understand some important basics on how to execute the Crayoligraphy, let’s get markin’!
Remember that tracing paper I suggested you try earlier? I prefer to print my download practice sheets only once on regular printer paper and not write on them — by overlaying a sheet of tracing paper, you can see the guides underneath, writing on the smooth vellum surface so as not to mark up your original sheets.
The first page of my downloads will have some drills to practice, called “Basic Strokes.” By following these guides, you’ll be training your hand to follow the curves, creating muscle memory as you repeat it over and over.
The second and third page have alphabets for you to trace or use as reference. Pay attention to the way the lines curve, connect, and create positive and negative space. You’ll eventually commit each form to memory, allowing you to recall the shape. Your hand will also eventually just know the way, as you’re creating that muscle memory with every stroke.
Finally, the fourth page is full of motivational quotes that I have designed for you to trace and practice (please understand they are for personal use only). They were all created using a Crayola Broad Line Marker, and I made some artistic choices to extend loops or add in a curvy crossbar. You’ll even see I drew some sweet sparkles and lines, just to make them extra special.
Typically I write my Calligraphy letterforms over and over, awarding myself little stars to celebrate the ones that look best (forever a teacher grading papers). Put on some good music and relax, and have fun as you learn a new skill!
Parents & Teachers, kids love Crayoligraphy! 👧👦
In today’s age, children are obviously hooked on those screens — no judgement, my girls are constantly plugged in, and even the majority of their schoolwork requires laptops or iPad apps! I’m also always hearing about how schools typically don’t teach cursive the way they used to. My personal opinion is that teaching handwriting is beneficial — it requires quiet focus, fine motor skills, and lets children make something tangible away from the screen. All valuable stuff!
From my experience, kids really enjoy learning Calligraphy and Hand Lettering. The special-ness of the curvy letterforms intrigues them, and they get real satisfaction by practicing, eventually getting that “I made that!” feeling when they write a fancy word.
I encourage you to introduce Crayoligraphy to your own children — but even better, please try these digital download sheets in your classroom if you’re a teacher! It makes for a great time-filler activity, and it touches on those skills I mentioned. You can also incorporate Calligraphy (and general Hand Lettering) into any project within the classroom — posters, cover sheets for written stories, name tags — the list is truly endless! I’d be honored to hear about how you may use my free Crayoligraphy practice sheets in your home or classroom and get some feedback on how you like it.
Want to Learn More? 🧐
Now, I cannot claim that I invented the Crayoligraphy technique, nor the clever blended name, I’m simply a fan who loves to teach it because I believe it’s versatile for all ages and skill levels!
Here are links to learn more about using markers to craft beautiful hand written Calligraphy:
Happy Crayoligraphy-ing, dear Friends — have fun creating in a not-so-serious way!


